

How to Activate eSIM on iPad and Get Online Anywhere



Using an eSIM on iPad makes it easier to stay connected while traveling without needing a physical SIM card. From checking compatibility to installing and activating your plan, the process is usually simple. In this guide, I’ll walk you through how to activate eSIM on iPad.

- What Is eSIM for iPad?
- Check eSIM iPad Compatibility
- How to Install eSIM on iPad
- How to Activate eSIM for iPad?
What Is eSIM for iPad?
An eSIM for iPad is the same as your phone, which is a digital SIM built directly into your iPad. You don’t need to insert or replace a card to connect to a mobile network.
On a compatible iPad with cellular, an eSIM allows you to add a cellular data plan digitally. This can be especially useful when traveling because you can purchase a local or travel data plan and install it directly on your iPad.
With an eSIM on iPad, you can:
- Connect to mobile data without a physical SIM card
- Switch between available cellular plans in your iPad settings
- Use mobile data while traveling without relying entirely on Wi-Fi
- Keep your setup simple by installing a travel eSIM before or during your trip
Check eSIM iPad Compatibility
Before purchasing an eSIM, make sure your iPad supports cellular connectivity and eSIM. The availability can vary depending on the iPad generation, model, and region. These are the models support eSIM iPad:
- iPad Pro 11-inch
- iPad Pro 12.9-inch
- iPad Air
- iPad
- iPad mini
Ensure your iPad is Wi-Fi and cellular available, otherwise it is not able to use eSIM for iPad WiFi only. If you are still confused about how do I know if my iPad is eSIM compatible, you can try to find the add eSIM option in iPad or directly ask your carrier.
How to Install eSIM on iPad
Once you’ve confirmed that your iPad supports eSIM, you can install your plan in several ways. Here are the hang-on steps for the four methods to learn how to add eSIM to iPad.
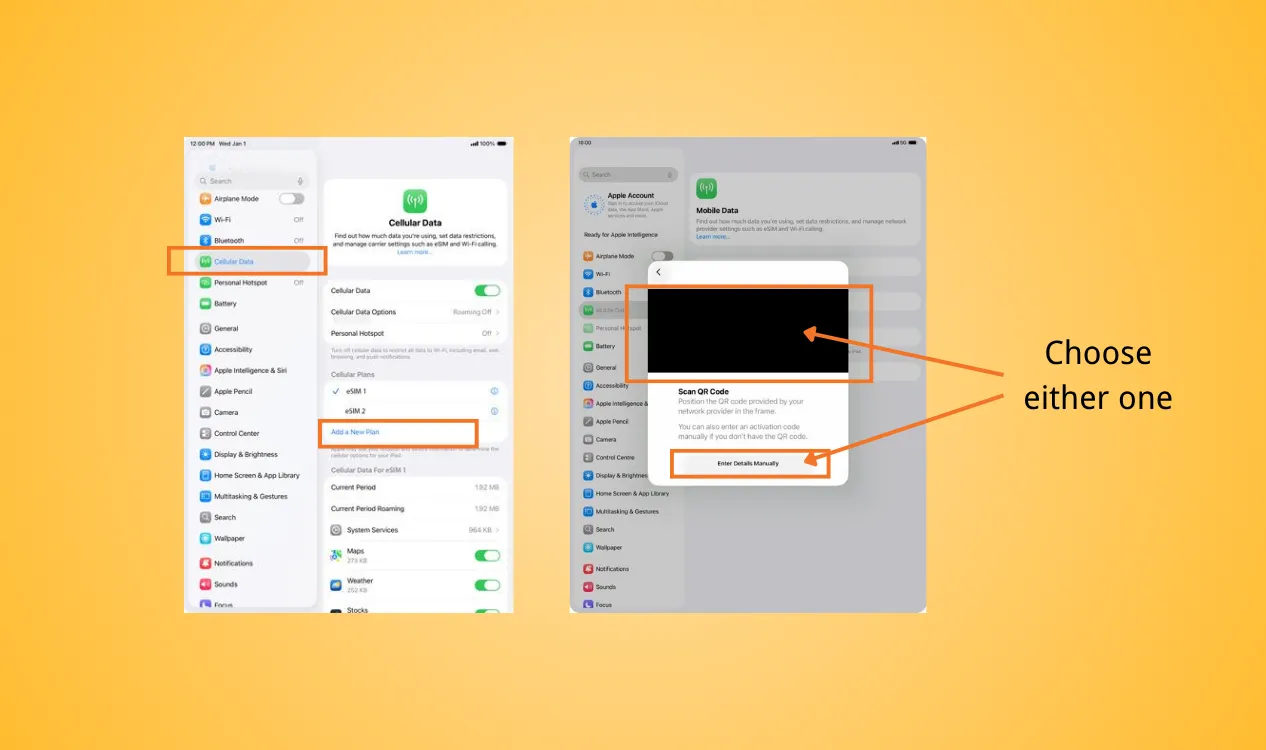
Install eSIM in Settings
Similar to the iPhone, you can install your eSIM for iPad directly through the Settings. Follow the step below.
- Step 1: Connect your iPad to Wi-Fi
- Step 2: Open Settings → Tap Cellular Data
- Step 3: Select Add a New Plan or the option to add a cellular plan
- Step 4: Scan the QR code or enter the information manually
- Step 5: Follow the on-screen instructions to finish the installation
Install eSIM iPad Through an eSIM Provider
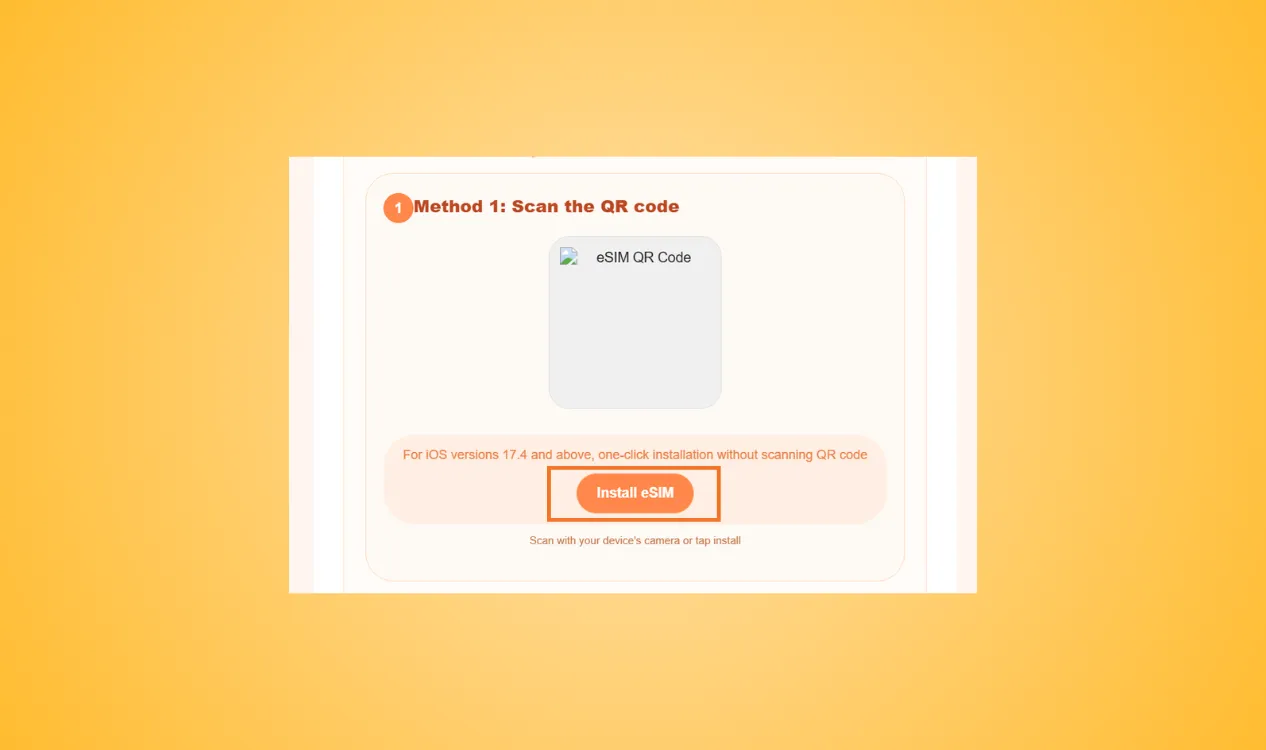
Some eSIM providers provide a more direct installation process through their website or app. For example, with NPN Travel eSIM, you can purchase an eSIM for iPad and follow the installation instructions provided with your order.
After purchasing an eSIM plan from NPN Travel, you will receive an email with detailed installation instructions. You can simply auto-install with the shortcut button.
Set Up a Cellular Data Plan
You can also add a cellular data plan directly from your iPad. There are actually two ways:
- During initial iPad setup, follow the onscreen instructions to add and activate eSIM on iPad.
- Otherwise, if your carrier sends the cellular plan later, you may receive a "Carrier Cellular Plan Ready to Be Install" notification. Tap the notification, then tap Continue and follow the onscreen instructions to complete the activation.
Add Existing Cellular Plans
If you already have a cellular plan associated with your Apple account or carrier, your iPad may allow you to add an existing plan.
Go to: Settings → Cellular Data → Add a New Plan
You may need to sign in to your account or confirm the plan before it can be added to your eSIM iPad.
How to Activate eSIM for iPad?
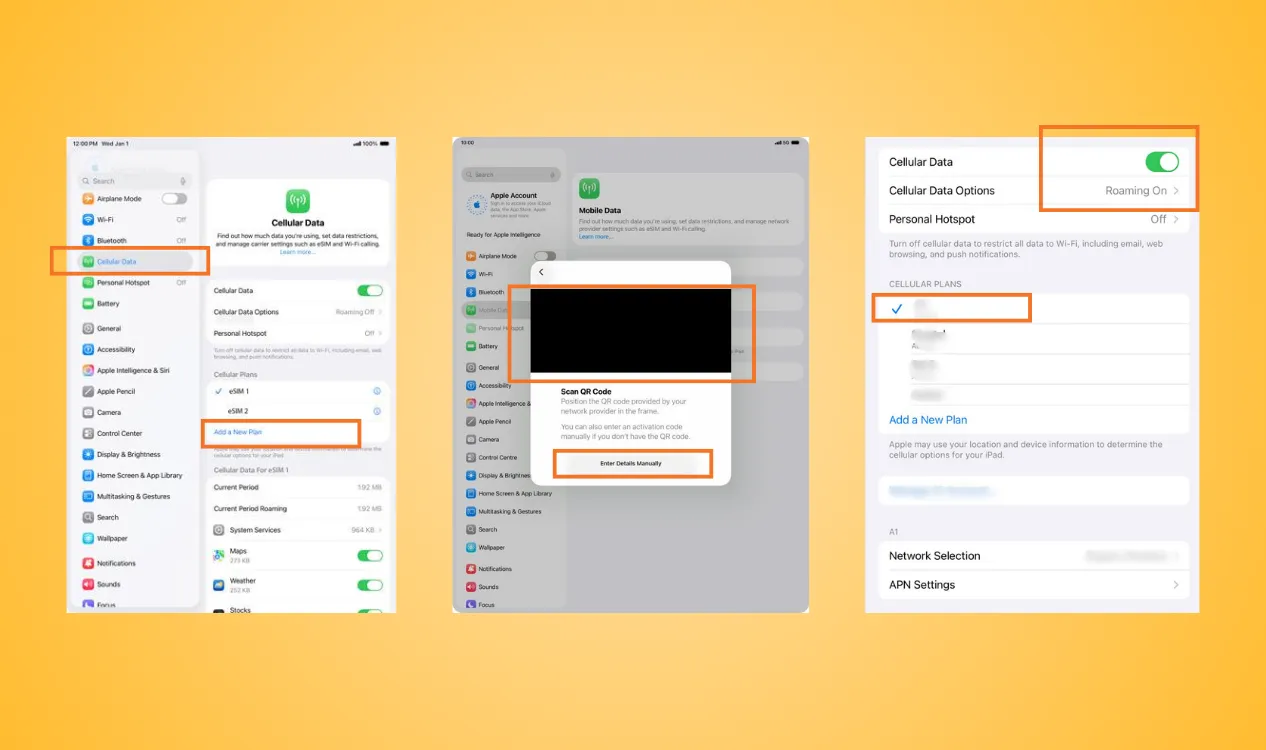
After installing your travel eSIM on iPad, you may need to enable Data Roaming so that the eSIM can connect to a supported network while you’re abroad. Test the connection by opening a website or app that requires mobile data after ensuring the right eSIM for iPad is selected.
To be reminded, only turn on data roaming for the eSIM you intend to use for mobile data in your destination. If you have another cellular plan on your iPad, check which line is selected for cellular data to avoid using the wrong plan.
Final Thought
Not every iPad supports eSIM. Once you’ve confirmed it is an eSIM iPad, you can install your plan through Settings, your eSIM provider, or your carrier.
With NPN Travel eSIM, you can get a better understanding of how to activate eSIM on iPad. The auto-install option also makes the setup process simple, so you can get your iPad connected with fewer steps and less worry about activation issues during your trip.


